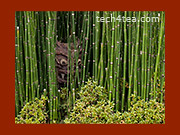
Archive for the ‘GIMP Intermediate Series’ Category

Replacing the background of a person or an object in a photo (Part 6 of 14)

Saturday, March 12th, 2011

Select the person or object easily in Quick Mask mode so that he can be isolated from an ugly or distracting background, and then replace the background altogether with another photo.
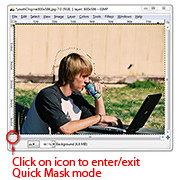
Before: Youth against a mundane background.

Before: Youth against a mundane background. Photo from morguefile.com.

After: Background changed to something more refreshing.

After: The refreshing green fields and blue sky matches the drink he is sipping.

The many selection tools in GIMP provide different ways to make and modify selections of people or objects in photos. The selected people or object can then be tweaked and adjusted without affecting pixels outside the selection. For example, the pixels within the selection could be darkened or lightened or the colour could be made more vivid.

Sometimes, none of the selection tools we’ve covered can quite select an object properly – parts that should be selected are not selected, while pixels that should NOT be selected are selected instead.

For example, in the photo of the youth working on his laptop, we want to isolate him from the mundane background and replace the background with something refreshing. But his outline is highly irregular and complicated so the Rectangle and Ellipse Select Tools are out – unless he is a rectangular or oval android.

Make a rough selection first using the Free Select Tool.

Make a rough selection first using the Free Select Tool.

The Fuzzy Select, Select by Color, and Foreground Select Tools are also out of their depths here because there is not enough contrast between the youth and the colours making up the background.

In this case, we start by using one of the usual selection tools to make a rough first-cut selection first, and then modify and perfect the selection by entering the Quick Mask mode.

Here, I used the Free Select Tool to encircle the youth, his laptop and the table – including a small area just outside of the outline. You will see the “marching ants” indicating where the selection boundary is.

Entering the Quick Mask mode

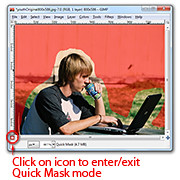
Quick Mask mode overlays unselected areas with a translucent pink.

Quick Mask mode overlays unselected areas with a translucent pink.

To enter Quick Mask mode, click on the Quick Mask icon (the small dashed rectangle icon at the bottom left corner of the image window), or press Shift-Q on the keyboard.

A translucent red tint is overlaid onto the photo showing the areas that are NOT selected.

This translucent pink overlay is called the selection mask. It works like masking tape in a physical paint job. You stick masking tape over areas where you don’t want the paint to get into, so that only the unmasked areas will be painted.

The selected areas – the youth, his laptop and the table – will be free from the red tint. Everything else that is not selected, like the grass, the chair and the wooden walls in the background are tinted temporarily with the translucent red.

Modifying and perfecting the Quick Mask

Do two things before going any further:

1. Press “D” on the keyboard to reset the colour swatches to black and white.
2. Activate the Paintbrush Tool in the Toolbox.

Zoom into the boundary area between the youth and the background to work on the details (“+” key to zoom in and Spacebar to pan). The default Foreground colour is black.

Reducing the selection

Paint on those areas on the photo that are NOT supposed to be selected but are selected – they are supposed to be overlaid by the translucent pink but are not.

As you paint, those areas will be overlaid with the translucent pink (although the Foreground colour is set to black) to indicate they have been unselected. Press the square bracket (“]” and “[“) keys to increase or decrease the size of the brush.

Adding to the selection

If you accidentally paint into the areas which is supposed to be selected, don’t worry. Click “X” on the keyboard to swap the colour swatches so that white is now the Foreground colour.

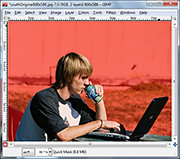
Paint on the quick mask until only the youth, his laptop and the table is not pink.

Paint on the quick mask until only the youth, his laptop and the table is not pink.

Paint over those areas that are supposed to be selected but are not – these areas are overlaid in translucent pink even though they are not supposed to be.

Instead of adding white, you will see the translucent pink erased from those areas painted, indicating that those areas are now selected.

In this way, finetune the mask, especially in the border region around the outlines, until only the youth is free from the translucent pink. Zoom in to inspect and work on the details.

You can switch between black and white for the Foreground colour by pressing X on the keyboard.

Confirming the selection

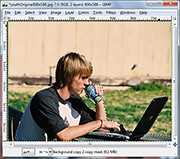
Check the marching ants selection boundary.

Check the marching ants selection boundary.

Press Shift-Q or the click on the Quick Mask icon to get out of Quick Mask mode. You will see the marching ants again indicating the selection boundaries.

The youth, his laptop and the table is now precisely selected while the background is not.

If you find the selection boundaries are still not perfect, enter Quick Mask mode again to modify the mask and get back out to check the selection boundaries. You can keep shuttling in and out of Quick Mask mode until the mask/selection is perfect.

Now any command you make within GIMP will apply only to the pixels within the selection.

Switching the background

Once you are happy with the selection, press Ctrl-C or Edit > Copy to put the selected pixels into the Clipboard.

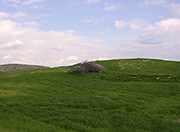
Green fields and blue skies.

Green fields and blue skies. Photo from morguefile.com

Open the new photo that will serve as the new background. Press Ctrl-V or Edit > Paste to paste the youth onto the new photo.

The pasted pixels will be added as a new temporary layer called “floating selection” that floats above all other layers in the image. In the Layers dialog, double-click the label of the floating layer type in a meaningful name and press Enter. The floating layer will be converted into a separate and permanent regular layer.

After: Background changed to something more refreshing.

After: The refreshing green fields and blue sky matches the drink he is sipping.

Activating the Move Tool from the Toolbox, you can drag the pasted layer to re-position it to the right place. You may need to resize either the new background photo or the pasted layer in order to match the sizes.

The edge of the youth may look too sharp and artificial at the moment, but we’ll address that in tomorrow’s tutorial.
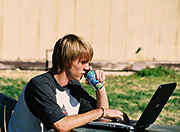
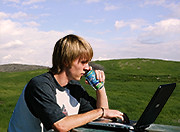
Photo scrapbook using GIMP Layers (Part 5b of 14)

Sunday, March 6th, 2011

Yesterday, we put several photos into a single scrapbook page and positioned them. In the second half of the tutorial today, we add text titles and captions to the scrapbook page/cover, complete with outlines.

Adding titles and captions

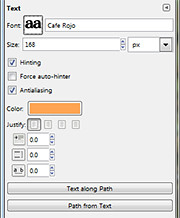
Pict 8: Options for the Text Tool

Pict 8: Options for the Text Tool

To add a title to the page, activate the Text Tool in the Toolbox. In the Tool Options, select the Font, size and colour to be used for the title of the scrapbook page. Click the square icon beside the Font label to display a list of installed fonts. Here, I used the Cafe Rojo font.

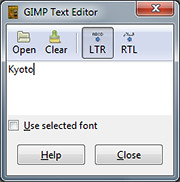
Click near the top left corner of the image to place the title. The GIMP Text Editor dialog box appears. I typed in the title “Kyoto” and pressed the Close button. A new and separate text layer is added in the Layers dialog.

Pict 9: GIMP Text Editor

Pict 9: GIMP Text Editor

To edit the text in the title, click on it in the image window with the Text Tool. The Text Editor pops up again for you to edit the text.
To reposition the title, click on it in the image window and drag. For fine adjustments of position, use the Arrow keys on the keyboard.

Repeat the same process to add the “Koyo” caption, the year “2010”, and the labels for the two thumbnails.

Adding outlines
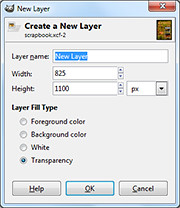
Pict 10: New blank layer for the outlines

Pict 10: New blank layer for the outlines

To add an EXTERNAL outline around the text and the thumbnails, first create a new transparent layer just above the Background layer and name it “Outlines”.

Select the Background layer in the Layers dialog and click the bottom left icon in the Layers dialog. Select the Transparency radio button in the New Layer pop-up dialog box.

Make sure all the elements are already in their final positions before adding the outlines, since this method adds the outlines on a separate layer. Moving an element later on will leave its outline behind in the original position.

Follow the steps below for each of the elements:

Pict 11: Add outlines or borders

Pict 11: Add outlines or borders. Here the thumbnails show koyo scenes at Nijojo Castle and Kiyomizu Temple at night in Kyoto.

Right-click the layer and select Alpha to Selection command from the pop-up menu.

Click the Foreground Color swatch in the Toolbox and select the desired outline colour from the Change Foreground Color dialog box that pops up.

Select the Outlines layer in the Layers dialog and from the main menu, select Edit > Stroke Selection.

In the pop-up Stroke Selection dialog box, enter the width of the outline and press the Stroke button. If it it too thick or thin, press Ctrl-X to undo and try again. Experiment with the width setting until the outline looks right to you.

This adds an external outline around the thumbnail or text caption.

Note: There are many methods of adding borders/outlines to elements within GIMP – none of which are very convenient. Through experience, I find this method produces the most crisp outline for text captions.

A more convenient approach is to add the outline directly to the thumbnail or text layer itself, so that moving the thumbnail/text would move the outline as well. But I find the quality rather jagged for text layers.

Saving as source files

Pict 12: Preserve the layers in .xcf file

Pict 12: Preserve layers in an .xcf file

The completed scrapbook design now comprises several different layers which can be independently adjusted and moved without affecting other layers. Save this as a “source” file in the GIMP’s native .xcf format.

Use the File > Save As command and in the pop-up Save Image dialog box, type in the name of the file followed by .xcf.

The layers are preserved so that when you open the file in GIMP in the future, you can still manipulate the layers independently – perhaps you may decide to edit the captions, or move the two thumbnails further to the left.

Unfortunately, the .xcf file format is not a commonly accepted file format since it is only for use within GIMP. You can print it with your desktop printer but the print shop will probably not accept it.

For printing at a shop, save an additional copy of the file in JPEG, since this is a ubiquitous file format that all graphics/printing software accepts.

Use the File > Save As command and this time save the file with a .jpg extension instead of the previous .xcf extension.

Photo scrapbook using GIMP Layers (Part 5a of 14)

Saturday, March 5th, 2011
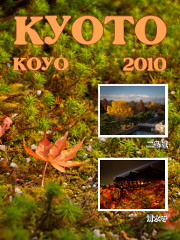
Make a photo scrapbook design by combining several photos and text captions on the same page.

Scrapbook design using layers in GIMP

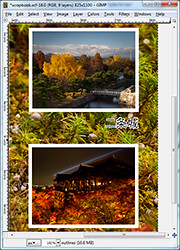
Pict 1: Scrapbook cover/page

There seems to be renewed interest amongst my friends to use their holiday photos to make photo scrapbooks.

They share their photos online even while they’re still overseas on holiday, but nothing beats a physical coffee-table scrapbook for family and close friends to thumb through and pore over.

In the first half of this tutorial today, we’ll use a photo as a background for a scrapbook cover/page and bring in additional photos. We’ll resize them as thumbnails and position them on the page.

In the second half tomorrow, we’ll add text titles and captions, and add outlines to them, as well as the thumbnails.

Including additional photos as layers

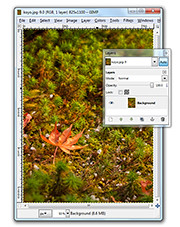
Pict 2: Single Background layer when photo is first opened.

Pict 2: Single Background layer when photo is first opened. This lonesome koyo was languishing on the grounds of the Ginkakuji in Kyoto.

When a photo file is first opened in GIMP, it resides on the single Background layer.

In our example, the photo file comprises the macro shot of the lone koyo (red maple leaf in Japanese) in the Background layer. We want to bring in two additional photos of koyo scenes as thumbnails.

Pict 3: Bring in additional photos

Pict 3: Additional photos

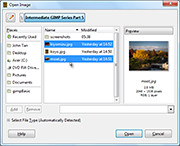
To bring in additional photos into the file, use the File > Open as Layers command from the main menu. You can bring in multiple photos all at once by selecting more than one photo in the Open Image dialog box that pops up.
Pict 4: Additional photos as layers

Pict 4: Additional photos as layers

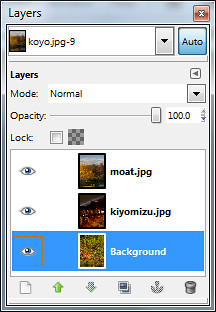
The two photos will be brought in as additional layers – one photo on each layer. For a quick introduction into layers and various ways of manipulating them, read Part 5 of the Basic GIMP series on “Correcting exposure using layers”.

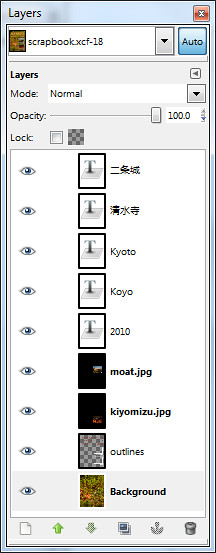
You can see the different layers in the file inside the Layers dialog.

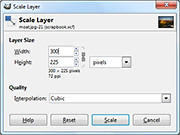
To reduce the size of the moat photo to a thumbnail, click on its name in the Layers dialog to select it and then use the Layer > Scale Layer command from the main menu. As a shortcut, simply right-click on the moat layer in the Layers dialog and select the Scale Layer command from the pop-up menu.

Pict 5: Scale layer down to thumbnail size

Pict 5: Scale layer down to thumbnail size

In the Scale Layer dialog box that pops up, I typed in 300 in the Width field. The Height field was automatically updated to 225 to keep the aspect ratio of the layer unchanged to avoid distortions. Both the default Interpolation setting of Cubic or Sinc (Lanczos3) will do the resizing with good quality.

Press the Scale button to complete the resizing.

Repeat the same process to resize the other photo into thumbnail size.

Pict 6: Move, Alignment and Text tools in the Toolbox

Pict 6: Move, Alignment and Text tools in the Toolbox

Positioning the thumbnails

To move and position the thumbnails, activate the Move Tool from the Toolbox. Now you can just click and drag any layer you see in the image window.

Pict 7: Options for the Alignment Tool

Pict 7: Options for the Alignment Tool

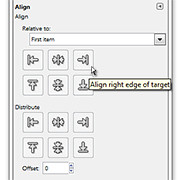
To align the two thumbnails, activate the Alignment Tool in the Toolbox. Click the first thumbnail and shift-click the second thumbnail to select both. You can also drag a rectangle that encloses both thumbnails to select both at the same time.

In the Tool Options, click one of the icons to align either the left or right edges of the thumbnails.

Tomorrow, we’ll add text captions and outlines to the elements in the scrapbook cover/page.

Select by Color or Foreground Select Tools in GIMP (Part 4 of 14)

Sunday, February 27th, 2011

These less frequently used selection tools can be real time-savers if you know when they are the most suitable tools for the job.

The Fuzzy Select Tool works wonders for selecting large contiguous areas of a photo with relatively uniform colour even if the outline is complicated.

In yesterday’s case, clicking on the blue sky around the temple in the photo selected all the blue pixels “connected” to the clicked pixel by other selected pixels.

Select by Color Tool

If, say there is a window in the temple showing a bit of blue sky through it, those blue pixels won’t be selected when the Fuzzy Select Tool is clicked outside the outline of the temple.

Similarly, if the cursor is clicked inside the window showing the blue, the blue sky around the temple won’t be selected.

To add such segregated areas to the main selection, hold down the Shift key on the keyboard and click on those areas with the Fuzzy Select Tool.

For more control, I tend to prefer using the Fuzzy Select Tool together with the Shift key.

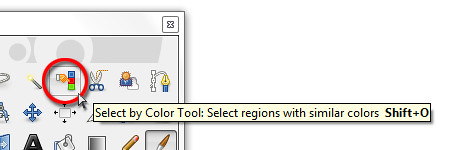
Select by Color Tool in the GIMP Toolbox

But if there are many isolated areas to be selected, a more suitable tool is the Select by Color Tool.

The Select by Color Tool works exactly like the Fuzzy Select Tool except that pixels from the ENTIRE photo that are similar in colour to the clicked pixel are selected – whether contiguous or segregated.

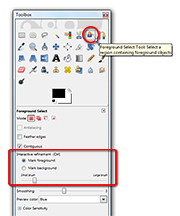
Foreground Select Tool in the GIMP Toolbox

Foreground Select Tool in the GIMP Toolbox

Again, the Threshold value determines how similar a pixel should be in order to be selected.

So if the temple had many windows showing blue skies, clicking a blue pixel in any one of the windows would select all the blues pixels in the sky.

Unfortunately, any of the tourists wearing blue will also have their blue clothes selected. That’s why I tend to prefer the Fuzzy Select Tool because it allows me to control exactly what I want to select.

Foreground Select Tool

Another selection tool that can occasionally work wonders is the Foreground Select Tool. It is used to select an object in a photo against a background, preferably with contrasting colours (see above Picture).

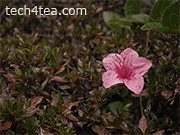
Wild pink flower in Magome, Japan

This wild flower looks a tad pale and dull on an overcast day.

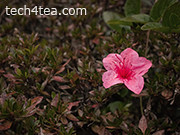
Pink flower made more vivid

The pink flower now stands out against the pale background.

In the photo of a wild flower I snapped in Magome, Japan, Iet’s select the flower in order to make the pink more vivid against the surrounding grass. Download the Before photo to follow along.

Activate the Foreground Select Tool from the Toolbox.

The cursor turns into a lasso. Use the cursor to drag an outline outside but around the flower. For selecting the outline, the tool behaves like the Free Select Tool. Select close to the outline of the flower but do not stray inside the flower.

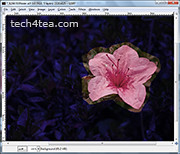
The initial mask when the flower is first outlined

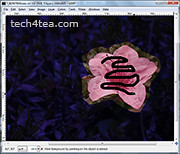
Paint inside the flower to define what colours to keep

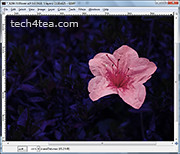
GIMP adjusts the mask to the flower's borders

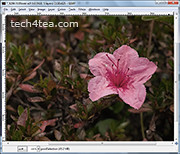
Pressing Enter converts the mask into a selectionVarious stages of using the Foreground Select Tool. Click each thumbnail to open enlarged photo.

Once the outline is complete, GIMP overlays the area outside the outline with a dark blue translucent mask, while the appearance of the flower and its immediate surrounding inside the outline remains unchanged.

The cursor now changes into a paintbrush. Paint inside the flower.

There is no need to paint the entire flower. If the flower contains different colours, try to paint over the different colours to tell GIMP they are part of the flower. Avoid painting outside the flower.

After the initial painting, the dark blue mask closes in so that only the flower remains visible. The clearly visible areas indicate the areas that will be selected. In this case, GIMP did a perfect job.

You can still modify the mask if the flower had not been perfectly masked.

In the Tool Options are two radio buttons that determines the effect of painting on the photo.

By default, the “Mark foreground” option is selected. If there are parts of the flower that are covered by the blue mask, paint on those areas to unmask them.

If there are areas outside the flower that are not masked in dark blue, select the “Mark background” option in the Tool Options and paint on those areas to mask them.

To work the details, zoom in and vary the brush size by dragging the slider in the Tool Options.

Once the mask has been finetuned so that only the flower is clear and the surroundings are masked by the translucent dark blue, press Enter on the keyboard to convert the mask into a selection.

You can now make the flower stand out by dialing up the vividness using Colors > Hue/Saturation command from the main menu.

Caution: While outlining the flower or painting to define the area to be included or excluded, Ctrl-Z or the Edit > Undo command does not work. To restart the selection process, select some other tool in the Toolbox and then select the Foreground Select Tool again.

Do magic with Fuzzy Select in GIMP (Part 3 of 14)

Saturday, February 26th, 2011

Select objects with uniformly coloured backgrounds easily even if the objects have complicated outlines.

Previously, we have made simple rectangular and elliptical selections in photos using GIMP’s Rectangle and Ellipse Select tool. We’ve also used the Free Select Tool to select objects with irregular outlines.

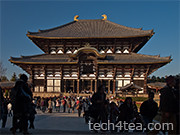
Todaiji Temple in Nara, Japan - a UNESCO World Heritage Site

Pict 1: The Todaiji temple as seen against a clear blue sky.

These selections allow us to do local adjustments – whatever adjustments we make are confined to only the pixels within the selection boundaries.

Sometimes, the object we want to select in the photo is against a background with uniform colour, such as the sky, where the colour comprises a narrow range of tones of the same colour (see Picture 1).

In these cases, it is easier to select the uniform background using the Fuzzy Select Tool and then invert the selection rather than try to select the object itself – especially if the object has a complicated outline.

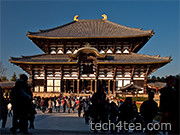
Temple after brightness and contrast increased

Pict 2: The temple has been lightened up and contrast increased.

The tool works best when the background colour is markedly different from the object to be selected.

In the photo of Todaiji in Nara, the temple is slightly underexposed and flat against the bright sky. I want to lighten up the temple without whitening out the nice blue sky. So I need to select the temple and the foreground scene before applying the lightening (see Pict 2).

Fuzzy Select Tool

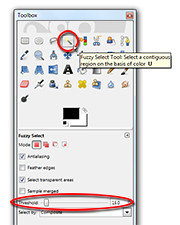
Activate the Fuzzy Select Tool from the Toolbox.

Activating the Fuzzy Select Tool from the Toolbox

It is known more commonly in other photo-editing programs as the Magic Wand tool because of its ability to make a complex selection seem so easy – where large welts of relatively uniform colour are involved. In fact, the symbol and cursor for the tool in GIMP comes in the form of a magic wand.

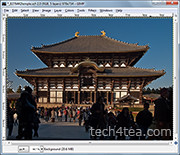
Click on any part of the blue sky. Large parts of the blue sky are selected as indicated by the marching ants showing the complex boundary of the areas selected. What has happened is that the Fuzzy Select Tool has selected all pixels of similar colour to the pixel that was clicked by the tool.

How similar must a pixel be to the clicked pixel for it to be selected? This is determined by the Threshold slider in the Tool Options.

Changing the default value from 15 to zero means that only pixels whose colour is exactly the same as the clicked pixel is selected. Using the maximum value of 255 means all pixels in the photo will be selected.

The selection process

There is a shortcut to varying the Threshold value while using the Fuzzy Select Tool. When you first click in the area to be selected, don’t release the button just yet.

Drag the mouse to the right or downwards and the Threshold value will be increased. You can see the selected areas grow as you drag the mouse cursor. You can also see the Threshold slider in the Tool Options moving to the right.

Conversely, drag the mouse to the left or upwards to decrease the Threshold value. You will see the selected areas shrink as you drag the mouse cursor. The Threshold slider also moves to the left.

Fuzzy Select Tool in action

Pict 3: The bright blue sky is selected by the Fuzzy Select Tool.

Stop or drag the mouse cursor in the opposite direction when you see the selection spilling into the temple itself. Release the mouse button to confirm the selection (see Picture 3).

If there are areas in the sky, that are not selected, hold down the Shift key on the keyboard and click in those areas to add them to the existing selection.

If the photo includes many isolated areas of the colour to be selected, use the Select by Color Tool instead.

Lighten up the temple

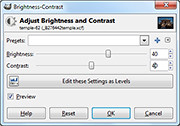
The Brightness and Contrast sliders were increased to 40 to liven up the temple.

For the moment, the blue sky is selected while the temple and the foreground are not.

To invert the selection, press Ctrl-I or Select > Invert from the main menu. The temple and the foreground are now selected while the blue sky is unselected.

The temple and the foreground can now be lightened (for instance, with the Colors > Brightness-Contrast command) without blowing out the sky.

Freehand selection in GIMP (Part 2 of 14)

Sunday, February 20th, 2011
Select irregularly shaped objects in photos using the Free Select Tool in GIMP.

In the Basic GIMP series, we used the rudimentary Rectangle and Ellipse Select tools to create simple selections in a photo.

What if we want to select an object in a photo that has an irregular outline? Check out the Free Select Tool.

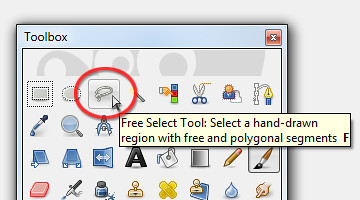
As with the other selection tools in GIMP, the Free Select Tool can be found at the top of the Toolbox.

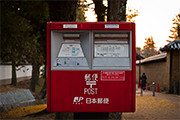
Little red Japanese postbox

The red traffic cones and receding pedestrian are a tad distracting behind the postbox.

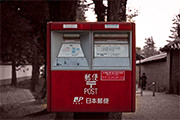
Arty interpretation of a postbox in Japan

Toning down the background focuses the viewer's attention on the main subject.

In the photo I snapped in Nara – Japan on a cool evening last autumn, I made the red postbox stand out by removing colour from its distracting surroundings and tinted the surroundings with a light reddish shade.

This is usually done to bring put the emphasis on a main subject by toning down the background, especially if the background is brightly coloured or distracting.

It is also a popular technique to turn a mundane snapshot into something arty.

Download the Before photo and follow along.

GIMP's Toolbox

Activate the Free Select Tool at the top of the Toolbox

Using the Free Select Tool

In the Toolbox, activate the Free Select Tool. Click (and let go of the mouse button) anywhere on the edge of the postbox. Move the cursor to the next point on the edge of the postbox and click again.

GIMP joins the two mouse clicks with a straight line to indicate the edge of the selection you are making. An anchor point is also created at each end of the edge to indicate where the mouse was clicked.

Around the corners of the postbox, the edges are rounded. Zoom in (press “+” on the keyboard) to get a better view to make a more precise selection.

Where the curved edge begins, click but hold down the mouse button and drag the cursor along the curved edge. You can see selection boundary trace around the curved edge.

At the end of of the curved edge, release the mouse button. To continue selecting straight edges, simply click at the next point.

Repeat the above techniques around the edge of the postbox until you are back to the starting point. This completes the selection process.

Along the way, if you click at the wrong place or make a botched tracing around a curved edge, press the Backspace key on the keyboard. GIMP will remove the previous anchor point and line segment. Press the Backspace key once to remove each previous anchor point and segment.

Decolourizing and adding the tint

Once the postbox has been selected, press Ctrl-I to invert the selection. Drain the colour from the selected surroundings and tint it a pale red by using the Colors > Colorize command from the main menu.

In the Colorize dialog box, set Hue to zero and Saturation to 15 by dragging the corresponding sliders.

Size matters – resizing and reshaping a photo in GIMP (Intermediate series: Part 1 of 14)

Saturday, February 19th, 2011

Starting off the 14-part Intermediate Photo Editing series for GIMP this weekend, this warm-up tutorial looks at resizing and reshaping a photo.

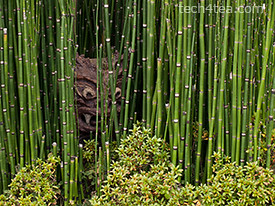
Ambush

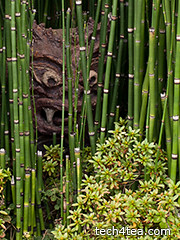
Pict 1: This gruesome troll was laying in ambush amidst a bamboo grove by the roadside in Kyoto as I walked past towards the train station.

With cameras offering more and more megapixels, we frequently need to reduce the size of photos for emailing to friends or sharing online – to reduce upload and download time. Sometimes, we need to change the aspect ratio (between the width and height of the photo) of the photo, perhaps to use it as part of a web page design.

Scaling a photo
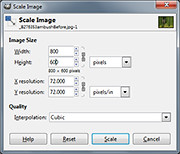
Scale Image dialog box in GIMP

Pict 2: Change the Width and Height pixel settings to resize the photo.

To reduce the size of a photo in GIMP, use the Image > Scale Image command from the main menu. A “Scale Image” dialog box pops up.

Change the Width and Height fields to the desired dimensions. Make sure the unit of measure for the Width and Height is in pixels (the default).

The chain link between the two fields locks the aspect ratio of the photo. Hence, you only need to adjust the pixel dimension of either the Width or the Height field and GIMP will calculate the corresponding pixel dimension for the other field so that the aspect ratio is kept constant.

Caution: Clicking on the chain icon will change it into a broken chain. The width and height can then be changed independently without preserving the original aspect ratio. Doing this for photos will cause distortions – people, trees and things in the photo become either tall and thin, or short and squat.

Leave the interpolation method to the default setting of “Cubic”. There is no need to adjust to adjust the resolution fields.

Press the “Resize” button and the pixels in the photo will be resampled.

Caution: Scale Image can be used to increase the size of photos but avoid that because the up-sampling will reduce the quality of the photos and make it appear blurry.

Reshaping a photo

To change the aspect ratio of a photo without causing any distortions, use either of the two following methods.

Portrait version of Japanese troll

Pict 3: The photo was cropped to a portrait orientation to zoom into the Japanese troll.

Use the Crop tool in the Toolbox to select the area in the photo to be retained. Use the Tool Options below the Toolbox to help select the area better. Check the “Fixed” checkbox to set a specific aspect ratio, width, height or size. Even after dragging out the selection, you can move the selection boundary or resize/reshape it before pressing “Enter” key to execute the crop.

Now that the photo is of the right aspect ration, use “Image Scale” to resize it if necessary.

What if the photo is so tightly framed that you don’t want to crop the forehead or an ear of the subject out of the photo? You’ll have to add pixels to the sides to make the photo fatter, or to the top and/or bottom to make the photo taller.

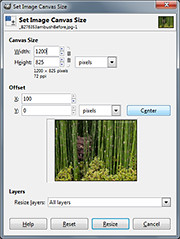
Dialog box for Canvas Size command in GIMP

Pict 4: Click the Center button to centre add new pixels equally between opposite sides.

Use the Image > Canvas Size to do this. A “Set Image Canvas Size” dialog box pops up.

Type the desired dimensions in pixels in the Width and Height fields under Canvas Size. Click the chain icon joining the two fields to de-couple them so as to specify a canvas with a different aspect ratio from the original photo.

Set the “Resize layers” dropdown box to “All layers”. Press the “Center” button to centre the photo.

A fatter image

Pict 5: New pixels have been added to the sides of the photo.

When you press the Resize button, additional pixels will be added either to both sides or to the top/bottom of the photo. Unlike the Scale Image command, the original pixels remain untouched.

Use “Image Scale” to resize the photo if necessary.

Caution: If the Width or Height dimensions are reduced, the photo will be cropped instead.

Fine-tuning and trouble-shooting

A taller image

Pict 6: New pixels have been added to the top and bottom.

If the photo was the Background layer before activating the Canvas Size command, the new pixels will take on the colour of the Background Color swatch in the Toolbox.

So in order to specify the colour of the new pixels, click on the Background Color swatch to select the desired colour – BEFORE activating the Canvas Size command.

If the photo was not the Background layer, activate the Image > Flatten Image command from the main menu before the Canvas Size command as well.

Adding a coloured border/frame

Sometimes, even though the photo is of the desired aspect ratio, we may want to add a coloured margin around it, either a white border to make it look like a traditional photo print, or a coloured frame for decoration.

A coloured photo frame or border

Pict 7: A solid-coloured photo frame/border has been added.

In this case, use the Canvas Size, and in the “Set Image Canvas Size” dialog box, increase the Width or Height setting while leaving the chain icon connected. Click the Center button to center the photo and set “Resize layers” dropdown box to “All layers” as before.

You can look at the preview thumbnail in the dialog box to see how thick the margin is with respect to the photo before pressing the “Resize” button.