In the Basic GIMP series, we used the rudimentary Rectangle and Ellipse Select tools to create simple selections in a photo.
What if we want to select an object in a photo that has an irregular outline? Check out the Free Select Tool.
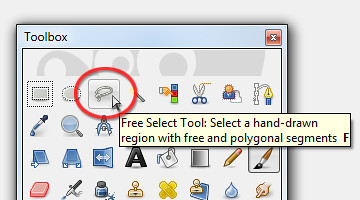
As with the other selection tools in GIMP, the Free Select Tool can be found at the top of the Toolbox.
This is usually done to bring put the emphasis on a main subject by toning down the background, especially if the background is brightly coloured or distracting.
It is also a popular technique to turn a mundane snapshot into something arty.
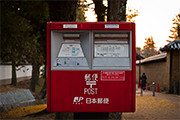
Download the Before photo and follow along.

Activate the Free Select Tool at the top of the Toolbox
Using the Free Select Tool
In the Toolbox, activate the Free Select Tool. Click (and let go of the mouse button) anywhere on the edge of the postbox. Move the cursor to the next point on the edge of the postbox and click again.
GIMP joins the two mouse clicks with a straight line to indicate the edge of the selection you are making. An anchor point is also created at each end of the edge to indicate where the mouse was clicked.
Around the corners of the postbox, the edges are rounded. Zoom in (press “+” on the keyboard) to get a better view to make a more precise selection.
Where the curved edge begins, click but hold down the mouse button and drag the cursor along the curved edge. You can see selection boundary trace around the curved edge.
At the end of of the curved edge, release the mouse button. To continue selecting straight edges, simply click at the next point.
Repeat the above techniques around the edge of the postbox until you are back to the starting point. This completes the selection process.
Along the way, if you click at the wrong place or make a botched tracing around a curved edge, press the Backspace key on the keyboard. GIMP will remove the previous anchor point and line segment. Press the Backspace key once to remove each previous anchor point and segment.
Decolourizing and adding the tint
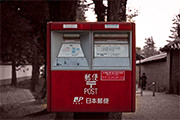
Once the postbox has been selected, press Ctrl-I to invert the selection. Drain the colour from the selected surroundings and tint it a pale red by using the Colors > Colorize command from the main menu.
In the Colorize dialog box, set Hue to zero and Saturation to 15 by dragging the corresponding sliders.
Tags: GIMP, image editor, photo editor, tips


[…] I used the Free Select Tool to encircle the youth, his laptop and the table – including a small area just outside of the […]