Select objects with uniformly coloured backgrounds easily even if the objects have complicated outlines.
Previously, we have made simple rectangular and elliptical selections in photos using GIMP’s Rectangle and Ellipse Select tool. We’ve also used the Free Select Tool to select objects with irregular outlines.
These selections allow us to do local adjustments – whatever adjustments we make are confined to only the pixels within the selection boundaries.
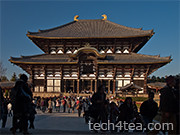
Sometimes, the object we want to select in the photo is against a background with uniform colour, such as the sky, where the colour comprises a narrow range of tones of the same colour (see Picture 1).
In these cases, it is easier to select the uniform background using the Fuzzy Select Tool and then invert the selection rather than try to select the object itself – especially if the object has a complicated outline.
The tool works best when the background colour is markedly different from the object to be selected.
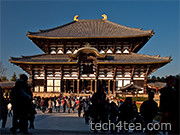
In the photo of Todaiji in Nara, the temple is slightly underexposed and flat against the bright sky. I want to lighten up the temple without whitening out the nice blue sky. So I need to select the temple and the foreground scene before applying the lightening (see Pict 2).
Fuzzy Select Tool
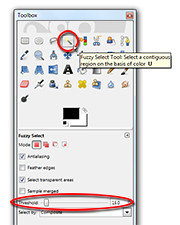
Activate the Fuzzy Select Tool from the Toolbox.
It is known more commonly in other photo-editing programs as the Magic Wand tool because of its ability to make a complex selection seem so easy – where large welts of relatively uniform colour are involved. In fact, the symbol and cursor for the tool in GIMP comes in the form of a magic wand.
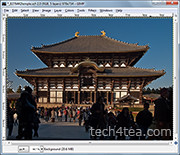
Click on any part of the blue sky. Large parts of the blue sky are selected as indicated by the marching ants showing the complex boundary of the areas selected. What has happened is that the Fuzzy Select Tool has selected all pixels of similar colour to the pixel that was clicked by the tool.
How similar must a pixel be to the clicked pixel for it to be selected? This is determined by the Threshold slider in the Tool Options.
Changing the default value from 15 to zero means that only pixels whose colour is exactly the same as the clicked pixel is selected. Using the maximum value of 255 means all pixels in the photo will be selected.
The selection process
There is a shortcut to varying the Threshold value while using the Fuzzy Select Tool. When you first click in the area to be selected, don’t release the button just yet.
Drag the mouse to the right or downwards and the Threshold value will be increased. You can see the selected areas grow as you drag the mouse cursor. You can also see the Threshold slider in the Tool Options moving to the right.
Conversely, drag the mouse to the left or upwards to decrease the Threshold value. You will see the selected areas shrink as you drag the mouse cursor. The Threshold slider also moves to the left.
Stop or drag the mouse cursor in the opposite direction when you see the selection spilling into the temple itself. Release the mouse button to confirm the selection (see Picture 3).
If there are areas in the sky, that are not selected, hold down the Shift key on the keyboard and click in those areas to add them to the existing selection.
Lighten up the temple
For the moment, the blue sky is selected while the temple and the foreground are not.
To invert the selection, press Ctrl-I or Select > Invert from the main menu. The temple and the foreground are now selected while the blue sky is unselected.
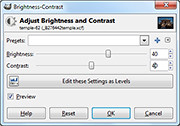
The temple and the foreground can now be lightened (for instance, with the Colors > Brightness-Contrast command) without blowing out the sky.
Tags: GIMP, image editor, Photoshop, tips
[…] Fuzzy Select, Select by Color, and Foreground Select Tools are also out of their depths here because there is […]