In yesterday’s case, clicking on the blue sky around the temple in the photo selected all the blue pixels “connected” to the clicked pixel by other selected pixels.
Select by Color Tool
If, say there is a window in the temple showing a bit of blue sky through it, those blue pixels won’t be selected when the Fuzzy Select Tool is clicked outside the outline of the temple.
Similarly, if the cursor is clicked inside the window showing the blue, the blue sky around the temple won’t be selected.
To add such segregated areas to the main selection, hold down the Shift key on the keyboard and click on those areas with the Fuzzy Select Tool.
For more control, I tend to prefer using the Fuzzy Select Tool together with the Shift key.
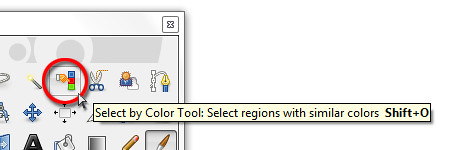
But if there are many isolated areas to be selected, a more suitable tool is the Select by Color Tool.
The Select by Color Tool works exactly like the Fuzzy Select Tool except that pixels from the ENTIRE photo that are similar in colour to the clicked pixel are selected – whether contiguous or segregated.
Again, the Threshold value determines how similar a pixel should be in order to be selected.
So if the temple had many windows showing blue skies, clicking a blue pixel in any one of the windows would select all the blues pixels in the sky.
Unfortunately, any of the tourists wearing blue will also have their blue clothes selected. That’s why I tend to prefer the Fuzzy Select Tool because it allows me to control exactly what I want to select.
Foreground Select Tool
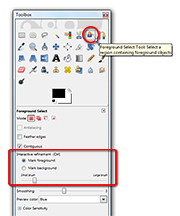
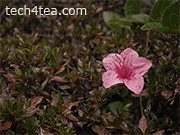
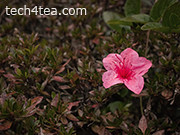
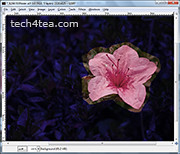
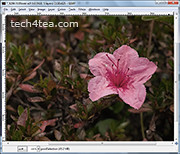
Another selection tool that can occasionally work wonders is the Foreground Select Tool. It is used to select an object in a photo against a background, preferably with contrasting colours (see above Picture).
Activate the Foreground Select Tool from the Toolbox.
The cursor turns into a lasso. Use the cursor to drag an outline outside but around the flower. For selecting the outline, the tool behaves like the Free Select Tool. Select close to the outline of the flower but do not stray inside the flower.
Once the outline is complete, GIMP overlays the area outside the outline with a dark blue translucent mask, while the appearance of the flower and its immediate surrounding inside the outline remains unchanged.
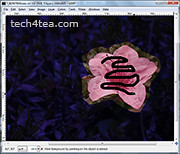
The cursor now changes into a paintbrush. Paint inside the flower.
There is no need to paint the entire flower. If the flower contains different colours, try to paint over the different colours to tell GIMP they are part of the flower. Avoid painting outside the flower.
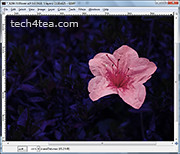
After the initial painting, the dark blue mask closes in so that only the flower remains visible. The clearly visible areas indicate the areas that will be selected. In this case, GIMP did a perfect job.
You can still modify the mask if the flower had not been perfectly masked.
In the Tool Options are two radio buttons that determines the effect of painting on the photo.
By default, the “Mark foreground” option is selected. If there are parts of the flower that are covered by the blue mask, paint on those areas to unmask them.
If there are areas outside the flower that are not masked in dark blue, select the “Mark background” option in the Tool Options and paint on those areas to mask them.
To work the details, zoom in and vary the brush size by dragging the slider in the Tool Options.
Once the mask has been finetuned so that only the flower is clear and the surroundings are masked by the translucent dark blue, press Enter on the keyboard to convert the mask into a selection.
You can now make the flower stand out by dialing up the vividness using Colors > Hue/Saturation command from the main menu.
Caution: While outlining the flower or painting to define the area to be included or excluded, Ctrl-Z or the Edit > Undo command does not work. To restart the selection process, select some other tool in the Toolbox and then select the Foreground Select Tool again.
Tags: GIMP, image editor, photo editor, tips
[…] Fuzzy Select, Select by Color, and Foreground Select Tools are also out of their depths here because there is not enough contrast […]