Starting off the 14-part Intermediate Photo Editing series for GIMP this weekend, this warm-up tutorial looks at resizing and reshaping a photo.

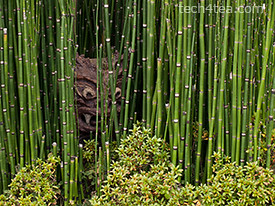
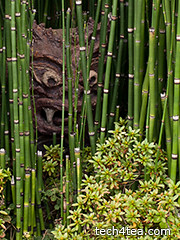
Pict 1: This gruesome troll was laying in ambush amidst a bamboo grove by the roadside in Kyoto as I walked past towards the train station.
With cameras offering more and more megapixels, we frequently need to reduce the size of photos for emailing to friends or sharing online – to reduce upload and download time. Sometimes, we need to change the aspect ratio (between the width and height of the photo) of the photo, perhaps to use it as part of a web page design.
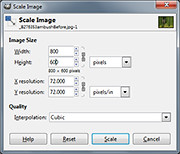
To reduce the size of a photo in GIMP, use the Image > Scale Image command from the main menu. A “Scale Image” dialog box pops up.
Change the Width and Height fields to the desired dimensions. Make sure the unit of measure for the Width and Height is in pixels (the default).
The chain link between the two fields locks the aspect ratio of the photo. Hence, you only need to adjust the pixel dimension of either the Width or the Height field and GIMP will calculate the corresponding pixel dimension for the other field so that the aspect ratio is kept constant.
Caution: Clicking on the chain icon will change it into a broken chain. The width and height can then be changed independently without preserving the original aspect ratio. Doing this for photos will cause distortions – people, trees and things in the photo become either tall and thin, or short and squat.
Leave the interpolation method to the default setting of “Cubic”. There is no need to adjust to adjust the resolution fields.
Press the “Resize” button and the pixels in the photo will be resampled.
Caution: Scale Image can be used to increase the size of photos but avoid that because the up-sampling will reduce the quality of the photos and make it appear blurry.
Reshaping a photo
To change the aspect ratio of a photo without causing any distortions, use either of the two following methods.
Use the Crop tool in the Toolbox to select the area in the photo to be retained. Use the Tool Options below the Toolbox to help select the area better. Check the “Fixed” checkbox to set a specific aspect ratio, width, height or size. Even after dragging out the selection, you can move the selection boundary or resize/reshape it before pressing “Enter” key to execute the crop.
Now that the photo is of the right aspect ration, use “Image Scale” to resize it if necessary.
What if the photo is so tightly framed that you don’t want to crop the forehead or an ear of the subject out of the photo? You’ll have to add pixels to the sides to make the photo fatter, or to the top and/or bottom to make the photo taller.
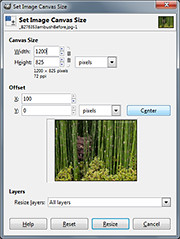
Use the Image > Canvas Size to do this. A “Set Image Canvas Size” dialog box pops up.
Type the desired dimensions in pixels in the Width and Height fields under Canvas Size. Click the chain icon joining the two fields to de-couple them so as to specify a canvas with a different aspect ratio from the original photo.
Set the “Resize layers” dropdown box to “All layers”. Press the “Center” button to centre the photo.
When you press the Resize button, additional pixels will be added either to both sides or to the top/bottom of the photo. Unlike the Scale Image command, the original pixels remain untouched.
Use “Image Scale” to resize the photo if necessary.
Caution: If the Width or Height dimensions are reduced, the photo will be cropped instead.
Fine-tuning and trouble-shooting
If the photo was the Background layer before activating the Canvas Size command, the new pixels will take on the colour of the Background Color swatch in the Toolbox.
So in order to specify the colour of the new pixels, click on the Background Color swatch to select the desired colour – BEFORE activating the Canvas Size command.
If the photo was not the Background layer, activate the Image > Flatten Image command from the main menu before the Canvas Size command as well.
Adding a coloured border/frame
Sometimes, even though the photo is of the desired aspect ratio, we may want to add a coloured margin around it, either a white border to make it look like a traditional photo print, or a coloured frame for decoration.
In this case, use the Canvas Size, and in the “Set Image Canvas Size” dialog box, increase the Width or Height setting while leaving the chain icon connected. Click the Center button to center the photo and set “Resize layers” dropdown box to “All layers” as before.
You can look at the preview thumbnail in the dialog box to see how thick the margin is with respect to the photo before pressing the “Resize” button.
Tags: GIMP, image editor, photo editor, tips


These are all amazing! Thank you for featuring my water fountain Kate, I’m so honored.