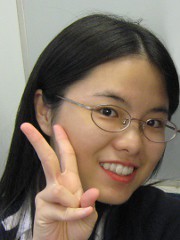
Why stop at removing those red eyes. Use GIMP to remove moles, pimples, scars and wrinkles. Whiten the teeth and eyes, add a twinkle to the pupils and redden those lips. Finally top it off with the soft-focus glam effect from yesterday’s tutorial.
Exorcise red eyes
First select the iris of the red eye. Activate the Ellipse Select Tool from the Toolbox and drag diagonally from one side of the red area to the other. Activate the Filters > Enhance > Red Eye Removal command from the main menu.
A Red Eye Removal dialog box pops up with a Threshold slider to control how much of the red to remove. Usually the default value of 50 for the threshold slider is adequate for removing red eyes. Watch the thumbnail preview as you drag the slider to check that the red has been completely removed.
Note that if you forget to select the red eye first, the filter will remove any traces of red from the entire photo!
Remove moles/pimples/scars/wrinkles and hot spots from camera flash
Activate the Healing Tool from the Toolbox (click on the band-aid icon). Set the size of the brush such that it is slightly larger than the mole or pimple to be removed. Ctrl-click on a clear patch of skin to designate that as the clone source from which to copy pixels.
Click on the mole/pimple. GIMP copies pixels from the clone source but blends the new pixels into the surrounding pixels seamlessly.
For wrinkles and scars, paint along the wrinkles or scars to replace them with smooth skin from the clone source.
Use the same techniques to replace hot spots on the skin resulting from reflections from camera flash.
Whiten teeth and eyes
To remove yellowish/brownish tints from the teeth, activate the Paintbrush Tool from the Toolbox. Press “D” on the keyboard to reset the foreground and background colours to black and white. In the Tool Options, set the mode to Saturation.
Select a Circle Fuzzy brush and set the size of the brush such that it is smaller than the height of the teeth. Dragging the Opacity slider to reduce the opacity of the brush to 50. Paint over the teeth to remove any yellowish/brownish tints from the teeth. Be careful not to remove the colour from the pink gums.
To brighten up the teeth, activate the Dodge/Burn Tool from the Toolbox. Select the Dodge radio button in the Tool Options and then paint over the teeth to brighten them.
To whiten the white parts of the eyes, simply repeat the above steps.
Lipstick magic (see Pictures 3 to 5)
To darken the colour of the lips, use the Dodge/Burn Tool from the Toolbox. Select the Burn radio button in the Tool Options and then paint over the lips to darken them.
Instead of darkening the lips, you can intensify the colour of the lips by increasing the saturation of the lip colours.

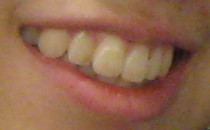
Pict 3: Before the makeover, the lips are pale while the teeth are off-white, as do all of us mortals.
Activate the Paintbrush Tool from the Tool box and set the Mode to Saturation. Click on the Foreground colour swatch in the Toolbox. In the Change Foreground Color dialog box that pops up, click the top right corner of the large square colour palette to choose any bright saturated colour and press OK.

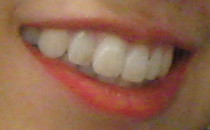
Pict 4: The teeth have been whitened and the lips reddened after the makeover.
Set the opacity to 50 and a brush size that is smaller than the thickness of the lips. Paint on the lips to saturate the lip colour. Avoid painting over the white teeth otherwise the brush will add a garish colour to the teeth.

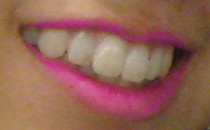
Pict 5: Feeling whimsical? Change the lipstick colour to an entirely different colour!
If you’re feeling whimsical, change the colour of the lipstick altogether. Create a new empty layer by choosing Layer > New Layer. Change the Layer Mode of the new layer to “Color”. Activate the Paintbrush Tool from the Toolbox.
Click on the Foreground colour swatch and select a new lipstick colour. Paint over the lips. To reduce the intensity of the new “lipstick”, drag the Opacity slider in the Layers dialog to reduce the opacity of the layer.
Twinkle in the eyes
The eyes are the windows to our soul. To add that twinkle to the pupils, select the Paintbrush Tool from the Toolbox. Set white as the foreground colour by pressing the letter “D” followed by “X” on the keyboard. Click inside the pupils to add the catch-lights.
Apply soft focus
To add to the cream to the cake, apply a soft focus effect to the photo. Refer to the steps described in yesterday’s tutorial (see Pictures 6 and 7).
Tags: GIMP, image editor, photo editor, tips


This is handy for making facebook profile pics. When I figure out how to do this makeover, I’ll try to clean up one of my photos to use for my facebook profile. Thks for the tut.
I’d intended this for a normal sized print. But of course you’re right. Looking at the example photo I used, it’s indeed suitable for use as an profile photo. Always great when people find some useful application of the techniques covered. Cheers!
Yeah, people sometimes ask me what happened to the mole on my cheek in my Facebook picture!
Please don’t do that for your passport photos, mind you!