Are lamposts sticking out of your head in a photo – or are tree branches growing out of the ears instead? Remove them using the Clone Tool in GIMP.
Yesterday, we looked at some camera settings that will help get from the camera the best quality photo for GIMP to work on. Today we return to GIMP to remove unwanted objects like overhead cables and background dustbins from a snapshot.
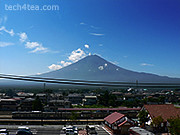
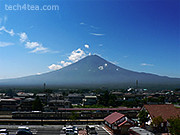
Pict 1: Clear vista of Mt Fuji (apart from those cables) from across Yamaguchi train station on a bright sunny day.
A common advice for photographers is to look out for objects sticking out from a subject’s head or ears when framing the shot. And then reposition the subject to avoid these shot-spoliers.
However, sometimes the space and angle available might make it impossible to do so. Other times, the photographer is so focused on the main subject that he doesn’t notice the lamp-post or tree branch in the background, or that bright green dirty dustbin to the side.
I took the photo of Mt Fuji on a sunny day in early autumn. The view of the mountain was perfect apart from those darn electric cables stretching right across the frame. I wanted to include the train rolling into the train station at the small lake-town of Yamaguchi, as well as buildings at the foothills of Fujisan.
Let’s use the Clone Tool in GIMP to remove those cables (see Pictures 1 and 2).
Selecting the Clone Tool

Pict 3: Select the Clone Tool by clicking on its icon in GIMP's Toolbox
The Clone Tool allows you to paint over the cables by copying pixels from other parts of the photo. Select the Clone Tool from the Toolbox (see Picture 3).
In the tool options in the lower half of the Toolbox, select the “Fuzzy Circle” brush. You can do this by clicking on the square icon beside the Brush label, and selecting, from the drop-down panel of brush shapes, the circular brush with blurred edges (see Picture 4).
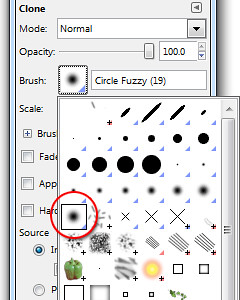
Pict 4: Choose the "Fuzzy Circle" brush from the dropdown panel in the tool options below the Toolbox
Drag the “Scale” slider in the tool options to control the size of the brush, or simply press the straight bracket keys on the keyboard – “]” to increase the brush size and “[“ to decrease. The cursor shows how big the brush is.
Cloning over the cables
To remove the cables near the centre of the Fuji photo, first designate the area from which to copy pixels from.
Hold down the Ctrl key and click on an area close to where you want to start painting over the cable. A circle with a cross-hair is displayed to indicate where this clone source is.
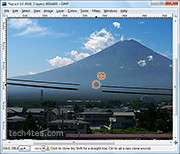
Pict 5: After designating the clone source, paint over the cables to copy pixels from the clone source.
Drag the cursor over the cable to paint over it (see Picture 5). As you paint over the cable, the clone source will also move such that it maintains its relative position to the cursor. If you make a mistake, press Ctrl-Z to undo and try again.
Change the clone source as you paint on different parts of the cables because the background behind the cable changes over the stretch of the cables.
Using a blurred edge for the brush helps merge the copied pixels seamlessly with the cable’s background. To make the merging even more seamless, reduce the opacity of the brush (drag the slider in the tool options) and paint a few times over each stretch of the cable.
Zoom in for the details
To work on areas where there are intricate details in the background behind the cables, get a bigger and clearer view by pressing the “+” key on the keyboard to zoom into the photo. For example, where the cables cross some pylons in the foothills and where the background of the cables change from sky to mountain.
Because of the clear edges involved, click the checkbox for “Hard edge” in the tool options. This allows parts of the pylon and the edge between the mountain and the sky to be copied crisply over the cables.
Reduce the size of the brush for more precision and use Ctrl-Z to undo mistakes. With some practice, you should get the hang of it quickly enough.
Cropping out the foreground
As you can see, cloning can be time consuming and straining to the eyes. If the unwanted objects or blemishes are around the edges of the photo, it is easier to just crop them out using the crop tool.
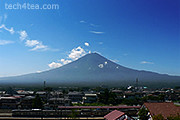
Pict 6: Cropping out the car park and other wires in the foreground also framed the photo more tightly drawing the focus to the mountain itself.
In the photo of Mt Fuji, I removed the car park and other wires in the foreground simply by cropping them out (see Picture 6).
Apart from unwanted objects in the photo, the Clone Tool can also be used to remove dark blotches in the photo arising dust or dirt spots on the lens or camera sensor.
Tomorrow, we’ll use GIMP to sharpen photos before sending them for printout.
Tags: GIMP, image editor, photo editor, tips
