Want to turn a colour photo into an artsy black-and-white? Or add a touch of nostalgia by turning it sepia? Or simply add any colour tint if you’re feeling flamboyant.
Yesterday, we removed undesirable colour casts using GIMP. Today let’s drain colour totally from the photo – and then put back some.
Draining out the colour
Using the Colors > Desaturate command
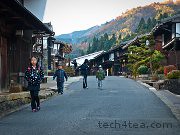
Pict 1: These kids were on their way to school at seven in the morning, at morbidly cold temperatures.
Black-and-white photos can convey the mood of a scene better than colour, sometimes turning a mundane colour photo into something dramatic.
If the background is colourful and distracting, turning the snapshot to black-and-white can help to mitigate the distraction from say a bright red car, shirt or signboard in the background and make the main subject stand out.
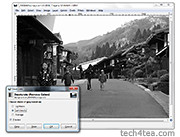
Pict 2: Converting the photo to black and white was more congruent with the traditional houses in this carefully preserved Edo-era Japanese village called Tsumago.
The simplest way to turn a colour photo into black-and-white is to select the Colors > Desaturate command from the main menu. The result may be a bit flat and dull but it’s quick.
A simple dialog box appears with three different methods of producing black-and-white versions of the photo. The methods are based on the Lightness, Luminosity and Average values of the pixels in the colour original (see Picture 2).
The results are slightly different from each other so click in turn on the radio button for each method to see a preview of the effect on the photo. Click OK to apply the conversion.
For more control over how the converted black-and-white photo looks, use the Colors > Components > Channel Mixer command instead.
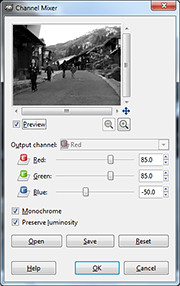
Pict 3: Drag the sliders in the Channel Mixer dialog box to control how the final black and white version will look.
In the Channel Mixer dialog box that pops up, check the “Monochrome” and “Preserve luminosity” checkboxes. Adjust the three sliders to control the resulting black-and-white effect (see Picture 3).
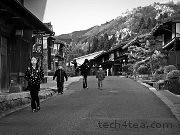
Pict 4: Using Channel Mixer allowed fine control over how the black-and-white conversion is done and can yield punchier results.
Unfortunately, the preview on the black-and-white effect is not available in the photo itself – it is only available in a small thumbnail inside the dialog box. You can enlarge the thumbnail preview by enlarging the dialog box itself, by dragging one of its corners outwards.
Press OK to apply the conversion (see Picture 4).
Tinting the photo with colour
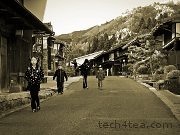
To add a touch of nostalgia to a photo, tint it with a touch of sepia. Apply the Colors > Colorize command from the main menu.
A Colorize dialog box appears with three sliders. Drag the Saturation slider down to 25 to reduce the intensity of the tint. For a sepia tint, drag the Hue slider to 45. Finally, adjust the Lightness slider to taste before pressing the OK button (see Picture 5).
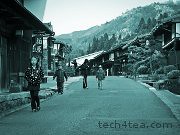
To tint the photo with colours other than sepia, varying the Hue slider in the Colorize dialog box (see Picture 6).
When applying the Colorize command directly on a colour photo, GIMP first converts the photo into black-and-white internally using the Desaturate command, before adding the colour tint. The result can be rather flat at times.
I prefer to convert the colour photo into black-and-white first using the Channel Mixer command – so that I can control which tones (skin tones, for instance) to stand out in the final photo.
Tomorrow, I’ll go back to basics and share what camera presets to use in the digital camera to get the best quality photo from the camera – for GIMP to work on.
Tags: GIMP, image editor, Photoshop, tips
[…] colour from sepia, or want more control over how the final result looks like, check out the “Black-and-white and Sepia” tutorial that was part of the 14-part Basic GIMP Series of […]