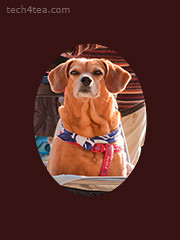
Pict 1: This dog's eyes caught mine outside the Todaiji - a UNESCO World Heritage Site in Nara, Japan.
Create simple vignettes or digital photo frames for those special photos.
Yesterday, we used the rudimentary Rectangle Select Tool in GIMP to create a selection for making local adjustments to specific parts of a photo.
Today we check out the Ellipse Select Tool and use it to make simple vignettes and photo frames for digital photos.This is also the most common request that I receive from readers.
The Ellipse Select Tool works in the same way as the Rectangle Select Tool.
In Picture 1 above, I want to add an oval photo frame around the dog. This will exclude the clutter and distractions in the vicinity of the dog and put the focus on the dog itself. Download the photo of the dog and follow along.
Since the photoframe around the dog will be an upright oval, crop the original photo from a broad landscape orientation to a tall portrait orientation.

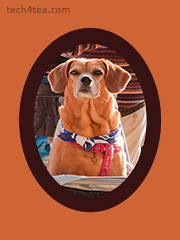
Pict 3: Crop the original photo and add the inner mat of the "photo frame" to exclude the distracting surroundings.
Using the Ellipse Select Tool, drag the cursor around the dog to form a tight oval selection around it (I have no idea whether it’s male or female). Now all the pixels inside the oval selection boundary is selected.
To create the inner mat for the photoframe, we want to fill the area OUTSIDE the oval with dark brown. Click on the Select > Invert command from the main menu to invert the selection. You can also press Ctrl-I on the keyboard as a shortcut. The area outside the original selection is now selected, while the original selection is now omitted.
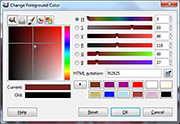
Click on the foreground colour swatch in the Toolbox and select a dark brown colour from the “Change Foreground Color” dialog box that pops up (see Picture 2 above).
To select a colour, first click in the thin vertical strip of colour to pick the colour family. The big square colour swatch shows the different tones of the selected colour family. Click within this big square to select the foreground colour.
From the main menu, select the Edit > Fill with FG command to fill the mat with dark brown (see Picture 3).
If you simply want a simple oval photoframe, you can stop here and crop the photo closer to the oval frame.
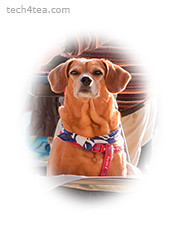
For a photoframe with an inner mat, you need to add the outer frame. Repeat the above steps but make a slightly bigger oval selection and fill it with orange (see Picture 4). Don’t forget to press Ctrl-I to invert the selection before filling it with orange.
A vignette is a frame with blurred edges, usually oval in shape – although you can ceate a vignette of any shape you want.
Activate the Ellipse Select Tool from the Toolbox. For a rectangular vignette, use the Rectangle Select Tool instead.
In the tool options below the Toolbox, click the “Feather edges” checkbox . A Radius slider appears that determines the thickness of the blurred region at the edge of the selection. Set the Radius setting to the maximum of 100.
Drag an oval selection around the subject. Press Ctrl-I to invert the selection and fill it with white or any colour you want. A quick shortcut to set the Foreground colour to white is to press “D” followed by “X” on the keyboard.
Tags: GIMP, image editor, photo editor, tips


Just tried out the photoframe effect. Simple and nice. Sending a few family shots to print over lunch. Thanks.
Glad you found it useful! Yes this effect is indeed simple and nice. Makes it look like those old fashioned studio portrait shots, except you can put brighter colours of your liking for the frame and mat.
[…] with something refreshing. But his outline is highly irregular and complicated so the Rectangle and Ellipse Select Tools are out – unless he is a rectangular or oval […]
[…] it look like it is a film slide – complete with black frame, sprocket holes, and labels. Adding a border around a digital photo adds visual interest to make it look more interesting, and can focus the […]
A very great tutorial..Thank a lot .
Glad you liked it.